You may think you can prevent the dating of Jack and Rose through dispatching them to different branches in same city, while they could meet during lunch break.

In our last story, we have set PC 1 to VLAN 10, and PC2 to VLAN 20. Then how to achieve the communication between them? The answer is through the routing function. There are two equipment can support this function, one is one-armed router, the other one is layer 3 switch.
We provide the example of one-armed router to achieve this communication.
1. Configure the sub-interface on the router and wrapper 802.1q.
Router> //Begin
Router>en //Enter privilege mode
Router#conf t //Enter global mode
Router(config)#int f0/0 //Create and enter port f0/0
Router(config-if)#no shutdown //Open port
Router(config-if)#int f0/0.1 //Create and enter the sub-interface
Router(config-subif)#description vlan10 //Describe the sub-interface
Router(config-subif)#encapsulation dot1q 10 //Wrapper 802.1q on sub-interface, and set VID as 10
Router(config-subif)#ip add 192.168.10.1 255.255.255.0 //Configure the IP address for the sub-interface as 192.168.10.1
Router(config-subif)#no shutdown //Open port
Router(config-subif)#exit //Return to user mode
Router(config)#int f0/2 //Create and enter port f0/2
Router(config-subif)#description vlan20 //Describe the sub-interface
Router(config-subif)#encapsulation dot1q 20 //Wrapper 802.1q on sub-interface, and set VID as 20
Router(config-subif)#ip add 192.168.20.1 255.255.255.0 //Configure the IP address for the sub-interface as 192.168.20.1
Router(config-subif)#no shutdown //Open port
Router(config-subif)#end
2. Dividing VLAN on the switch
Switch> //Begin
Switch>en //Enter privilege mode
Switch#conf t //Enter global mode
Switch(config)#vlan 10 //Create vlan10
Switch(config-vlan)#vlan 20 //Create vlan20
Switch(config-vlan)#exit
Switch(config)#int f0/2 //Create port f0/2
Switch(config-if)#switchport acc vlan 10 //Set port f0/2 into vlan10
Switch(config-if)#exit //Return to user mode
Switch(config)#int f0/3 //Create port f0/3
Switch(config-if)#switchport acc vlan 20 //Set port f0/3 into vlan20
Switch(config-if)#end //End
3. Define Trunk on the switch
Switch>
Switch>en
Switch#conf t
Switch(config)#int f0/1 //Create port f0/1
Switch(config-if)#switchport mode trunk //If the switch realizes the communication between vlans through the router, it needs to configure the ports connected to the switch into trunk mode, and only the trunk line can make the VLAN pass through.
Switch(config-if)#exit //Return to user mode
Through this way, PC 1 can communicate with PC2. Here the noon dating is working as the one-armed router.
Rose and Jack often meet at noon, so often they are late for work in the afternoon, as time goes by, their work efficiency drops, and now all colleagues around know.
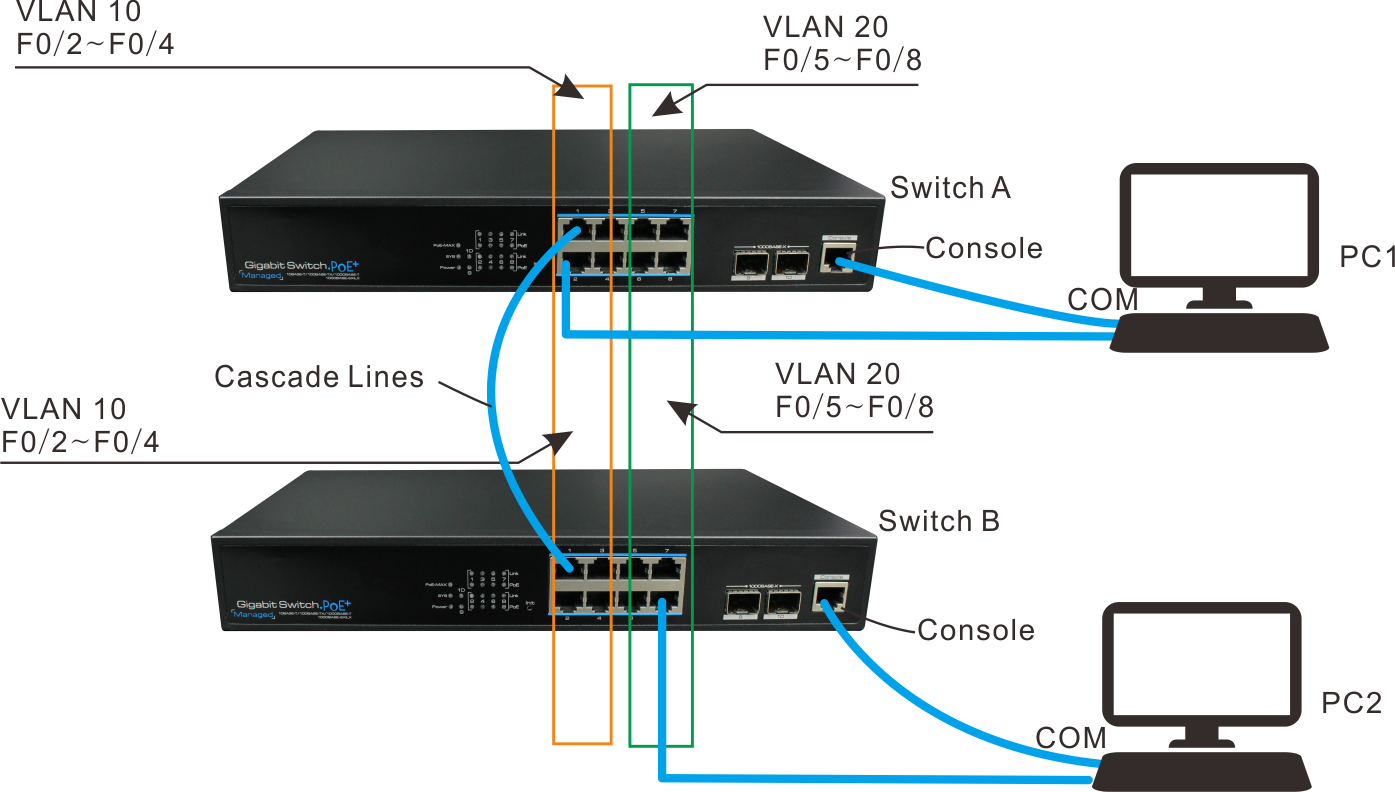
The boss is angry, and decide to dispatch Jack to another brunch in other city. This is like we add a switch into the system, and connect PC1 to this switch, as following:

Now, the PC1 and PC 2 can not communicate with each other.

To be continued.
+86-755-83898016-863
+86-1501-2669-765
[email protected]
Note: To speed up our service to you, please make sure the field with " * " mark is filled before you click on "Submit" button, Thank you!